Buyers
Buyers need to have a way to pay for their purchase into the escrow. The only requirement for that is to have a web3 wallet funded with a little bit of ETH for gas fees and the amount of the tokent required for the purchase, e.g. ETH or some stablecoin.
If you're not familiar with basic web3 concepts, we recommend starting with those here. Otherwise, continue below
Funding the wallet
The main thing to keep in mind when funding the wallet is that Unicrow currently runs on Arbitrum One and Base network. Therefore, ETH for gas fees and token for payment must be available in the wallet on the respective network.
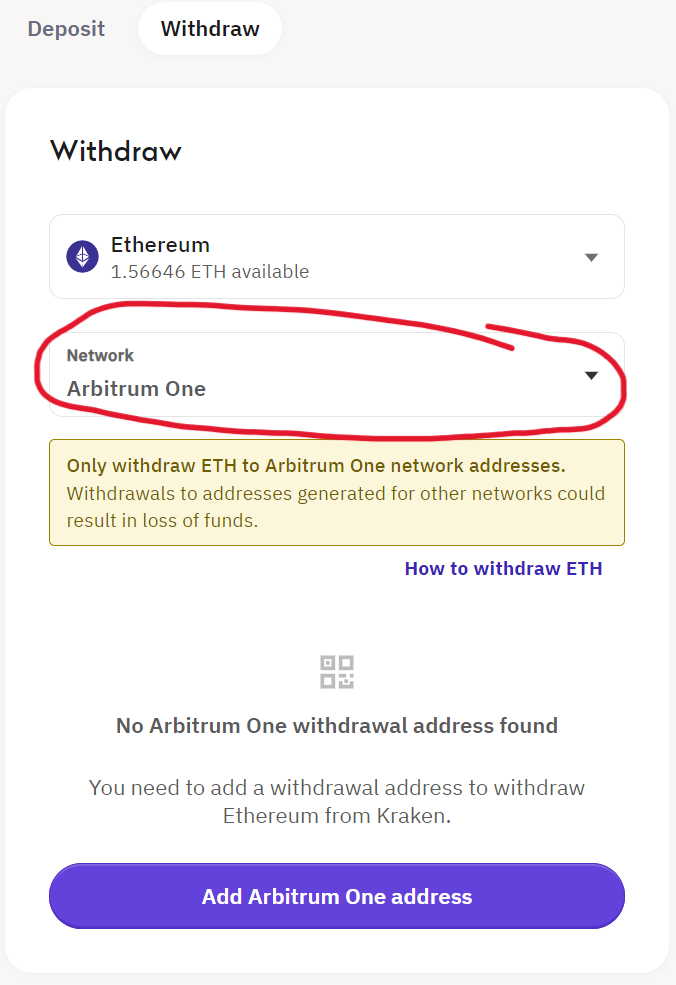
From a centralized exchange
The web3 wallet can be funded even on Arbitrum One or Base directly from a centralized exchange. The exact steps will depend on the exchange, but will typically involve selecting the token that the user wants to withdraw (ETH and the required payment token in this case), the network to which to withdraw it (Arbitrum One or Base), and pasting the wallet address. Below a screenshot from Kraken for reference.
Via a bridge
If you have the required balance on another network, e.g. Ethereum mainnet, or on other L2 such as Optimism or Polygon, you can bridge the funds to Arbitrum One via one of the web3 bridges. See the guide on our blog.
Paying via Unicrow
For any user with basic web3 experience, paying via Unicrow is intuitive, but those without the experience might find it reassuring to follow the steps below along as they embark upon their first web3 transaction.
Pre-requsites
- web3 wallet installed (see basic concepts)
- ETH and optionally some stablecoin in Arbitrum One or Base network (see above in Funding the Wallet)
Steps
The exact experience will differ a little bit depending on where exactly you are buying and what method of integrating Unicrow that site is using. The example below is using Domain Outlet which uses our [/tbd/](WooCommerce Integration)
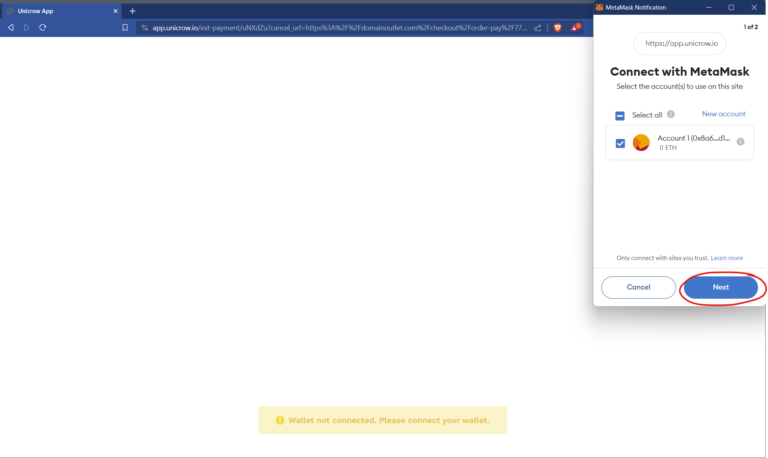
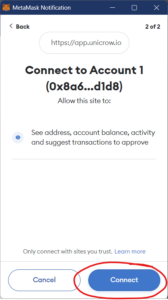
1. Connect Wallet
2. Switch network (if necessary)
If your wallet is connected to other network than Arbitrum One or Base, Unicrow will ask you to switch now.

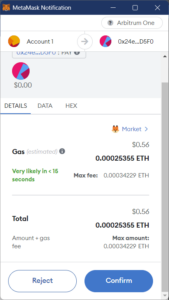
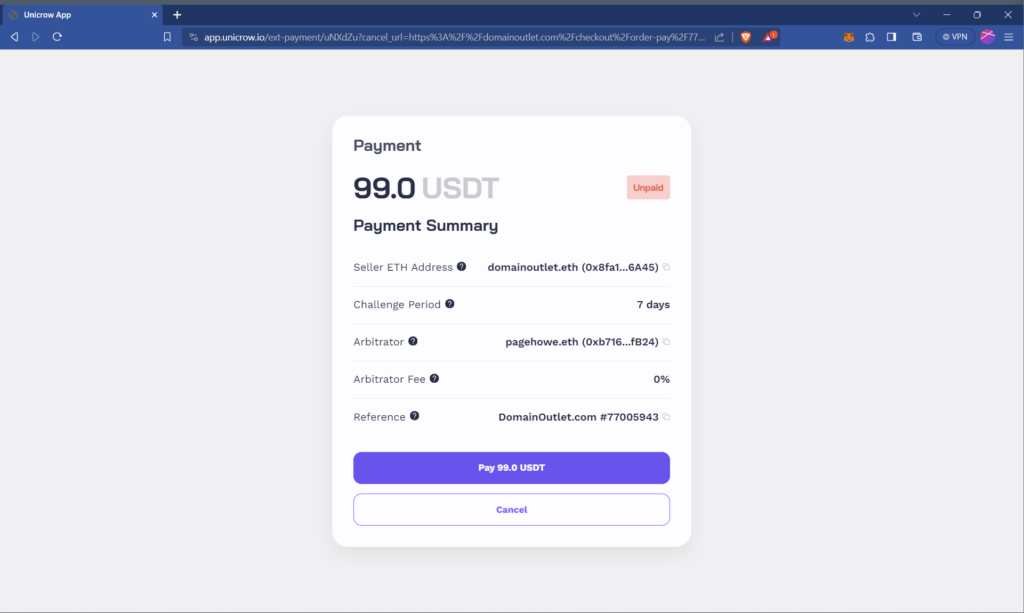
3. Review and confirm the payment
You may now review all the parameters of the payment before confirming it
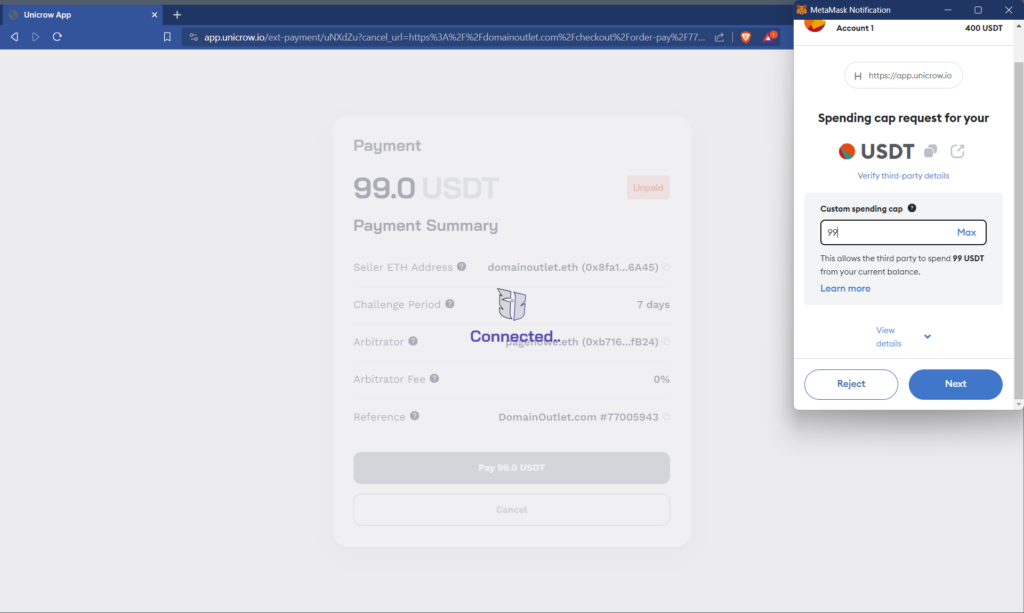
4. Approve "spending" (if necessary)
In order for Unicrow smart contracts to receive the tokens from you, you need to give them permission to “spend” them from your wallet. By default, only the amount necessary for this transaction will be filled in. You can optionally set higher (or Max) amount if you don't want having to approve again the next time.
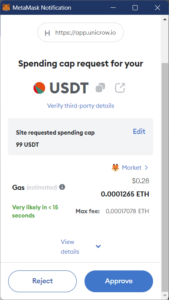
5. Confirm
Finally, you can send the payment. Unfortunately because of how web3 wallets and contract interactions work, you can’t see how much are you sending here. However, since you’ve approved only the amount needed for this payment, you have a guarantee that only that amount can be withdrawn.